Editing Custom Fields

Editing Custom Fields
The Administrator, Web Team Leader and the General Manager have the ability to edit the "Custom Field" data captured by the employees.

Should an employee make a mistake while typing and send the data before making the correction, an an adjustment needs to be made on a note or an order ID, the price of a sold item, etc., a correction can be made from the Reports tab.  
Go to the "Reports" tab and click the "Custom Field Report."  Generate it using the appropriate filters (team, user or dates, depending on the results you are looking for) and something similar to below will appear.
On the right side of the screen there are "Edit" buttons.  Find the item you wish to make changes to and click the "Edit" button.  The information that will appear will be the present values in the fields.
Change the information that you wish to correct as shown below:
Numeric values can be adjusted through a drop-down menu.  When the report is generated again the new saved values will be shown.

Web Team Leaders

Setting Up a Web Team Leaders

Pacific TimeCard is capable of adding Web Team Leaders. Theses managers are set up with web access that can be constrained to view/manage a subset of the company's employees.  This is particularly handy for companies that have many teams under one manager,  allowing the manager to be restricted to only his/her teams.

The following features are available to the Web Team Leader:
         * Monitor the map for GPS movement
         * Manage jobs and team members for assigned teams
         * View reports for the assigned employees
The following steps are needed to setup a Web Team Leader:
In your web based application go to the "Administration" tab and select "Manage Users."  once inside, click on "Add New" to create a new user:
The following window will appear:
The following fields are Mandatory:
1.  "User Type" select the "Web Team Leader"
2. "Time Zone" select the proper time zone were the web user lives
3.  "Login ID" Enter the Login ID, it will be case sensitive
4.  "Name" Enter the name of the web team leader
5.  "Password"  Enter a password
6.  "Re-enter Password"  Re-enter the same password
7.  Click "ADD NEW"
Once the user has been added, it is time to assign the specific teams that the leader will be able to access.  Go back to the "Manage Users" screen, find the ID of the newly added profile and click on it to edit.
Click on "Update Web Team Members" at the bottom of the user profile.
Assign the Team/Users for the Web Team Leader and click on Save.
Next time the user logs in to the web portal, he/she will only be able to filter and select the assigned users, as shown in the example below:


Searching and Adding Team Members

Searching and Adding Team Members
There may be a time when a supervisor is in the field with his/her team and they may need to have additional staff sent to them.  It could be someone not on their team but still needs to be clocked in by the supervisor.
This can be easily accomplished without the need to assign the person permanently to the supervisor through the Administrator portal, the supervisor can do it with the following instructions.

First Open the Menu and select "Team Clock In/Out." The "Team Clock-In/Out" will appear.
 Open the menu button and select the "ADD" option.
Once "ADD" has been tapped a screen will appear asking for the employees Device ID to be entered.  Make sure to contact your manager or customer support for the correct information.
 A confirm message will be shown, click on ADD to complete the transaction.
 
The employee will then be added to the supervisors list and may be clocked in as any other team member.
 *REMEMBER: The additional person will not be added permanently to the supervisors team unless the addition is done by the Administrator.  However this will allow the supervisor to clock in an employee when the administrator is not available to add them to the team or if it is a temporary assignment.

Office Admin Approval of Timesheets

Office Admin Approval of TimeSheets
If you have office administrators who only approve timesheets without the need to assign tasks they may be set up as "Office Admin" within the Pacific TimeCard system.  This designation works the same as the Payroll Admin with the added capability of filtering exactly whose timesheets will be approved.
FIRST go the the Administration Tab:
THEN: check on "Manage Users" in the :Staff" section:
From here click on "Add New."
Fill in the required fields as noted below:
The following are Mandatory fields:
         * User Type:  "Office Admin"
         * Time Zone:  (use correct timezone of user from drop-down)
         *Login ID: a combination of the user's name and last name, keep in mind it is case sensitive.
         * New/Confirm Password:  use a secure password of your election, make sure to enter the same one on both fields.
         * Language: select the appropriate language for the user.
Once this information has been entered click on "Add New."

Now you will notice that if you access the "Office Admin" profile, there will be a few buttons at the bottom, the one we are looking for called "Update Leader User Members."
With the "Update Leader User Members" you can assign or remove team members in order to filter whom the Office Admin will be able to view.  This allows the Office Admin to only view those assigned to him/her.
The first box "Select Teams" allows you to add a complete team to the Office Admin.  The second box "Select User" allows you to assign a specific employee/team member.  Once you have made your selections click SAVE.

Task Auto Search

Task Auto Search
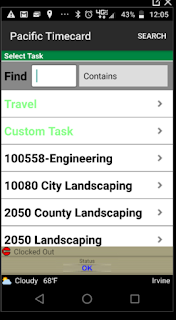
The "Auto Search" for tasks allows a team member to search for a task that may not be seen on the screen.  This is very useful for companies that have a large volume of tasks and are constantly uploading new projects.  There may also be a time when an employee cannot seem to find the job but knows that it has been uploaded into the system.
From the Select "Task Screen" in the "Find" box type the task or a portion of the task name:
 
Once you have typed in the task or a portion of the task name the list will shorten and the team member / employee can click on the task to complete their clock in.
Once the task (and sub-task if necessary) have been selected.  The screen will return to the main menu.


Map Default Filters

Default Filters for Maps
When logging into the Administrator Portal the below status bar will appear:
The filters are defaulted to the option that will allow you to see everyone at any time, if they are clocked in, clocked out or on break.

Notice the gear icon.  This will take you to the settings, allowing the default settings to be customized to your preferences when you sign in.
Click on the Gear, The status bar settings will appear and you may adjust them from the pull down menu.
Choose your settings and click SAVE
The default options will be changed to your custom settings and will remain set each time you log-in.

Premium Pay Answers Report

Premium Pay Answers Report
The "Premium Pay Answers Report" is a very useful report that will enable employers using the "Premium Pay" feature to have a detailed summary of what employees have answered on each questions.  Below is a sample of the kind of data you will be able to retrieve.

Not only will each task and break be sorted by time but the last two columns will tell if one of the answers chosen after finishing a break triggered a possibility of Premium Pay as well as the reason why.

On the above example, the employee took a "Rest Break" at 8:15 AM and a "Meal Break" at 12:00 PM.  In both cases, the employee finished the rest/meal before the expected time required.  On the "Rest Break" it was due to the employees own election, but on the "Meal Period" it was ended due to work requirements, this triggered the "Premium Pay" flag as noted by the "Y" in the "Triggered?" column.

Business Hours

Individual or Team Business Hours
Pacific TimeCard has enhanced the Business Hours rules to enable  the unique assignment of rules to specific employees or teams.  Start by going to the Administration tab and selecting "Manage Business Hours."
On the next screen, the rules that have been created will be shown.  If you wish to apply a rule for the whole company, you can always use the "Default" option.  To create a new individual rule, click on the "Add" button.
Next select the "Business Hours."  Make sure to give this rule a name in the "Description" field.  Leave blank any of the time fields that do not apply.  By clicking the blank section on the "Select Users(s)" and "Select Teams(s)" fields, you will enable a drop-down menu allowing you to select the users and teams that apply to this rule.  -- When done Click SAVE

When you return to the "Manage Business Hours" section, you will find a newly created rule listed with the previously existing rules.

Edit Event Reasons

Manage Edit "Event Reasons"
It is possible to set up your own reasons for editing an event.  In order to set this up, go to the "Administration Tab" and select "Manage Edit Event Reasons" from the "Staff" Section.
On the next screen Click  "Add New"
Type your customized reason and Click on "Add New"
Your newly added reason will be shown in the previous screen as show below:
Next time you are making edits on the "Edit User Events" section, you will see all of your customized reasons in the drop-down menu:

New Enhancement: Bi-weekly Timesheet Signoff

We have a quick announcement to make on this post, we have just implemented a new much requested frequency for the  timesheet signoff :  B...