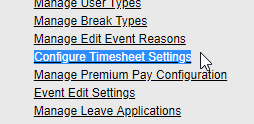
All reports sent can be sent to an email address without even accessing the Web Portal. To set up the automatic report schedule, go to the Reports in the web base application, to access, click on "View Scheduled Reports."
Once inside, you will see the screen with all Scheduled Reports (or groups of reports). If it's the first time, it will be empty, but let's change that! Click on the Add button.
 The following image illustrates the different fields that you will see on the next screen:

1. Enter a Description for the Report you are creating.
2. Use this field to Add/Remove all the reports that you want to include in the same email.
3. Pick your Time Zone.
4. Select the period you want the report to be generated at.
5. Select whether the report is generated indefinitely or if it should end on a specific date.
6. Here you will select if you want to create a CSV file (Excel Spreadsheet) for each individual report or want the HTML version (similar to generating it online). Then:
o Email To: Type the email addresses you wish to send the emails to, use commas if you need to list more than one
o Email Subject: Define the subject of the Email on this area.
o Email Body: Type the body of your Email here, it will be the same each time.
When done, click SAVE! Once the report is generated, it will be listed on the "Report Schedules" screen. To edit any values, click on"ID" and that should be it.


No comments:
Post a Comment