Premium Pay Configuration

Premium Pay Configuration
The Premium Pay Configuration will enable companies to keep track of their employee's meals.  This feature will allow for different settings.  1) Assign meal time breaks for specific periods of time.  2) Setup a default time for the meal break, which will be used to determine if employees had to finish their break before time due to work requirements. 3) Set up rules allowing the system to provide a number of automatic alerts, such as break reminders of too short or too long a period.
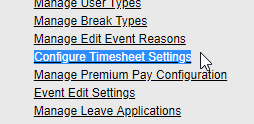
To enable 'Premium Pay" go to the Administration tab and click on "Manage Premium Pay Configuration." The options below will appear.  
"Enable Premium Pay" must be checked to activate this setting.
The following list explains each of the configurable fields.
1)  First Meal Entitlement Duration: minimum shift duration that entitles an employee to a first break. Enter the minimum number of hours needed to work to receive the first break.
2) Second Meal Entitlement Duration: minimum shift duration that entitles an employee to a second break. Enter the minimum number of hours needed to work to receive the second break.
3) First Meal Within Duration: maximum time where the first break must be taken. Enter the maximum number of hours needed to work to receive the first break.
4) Second Meal Within Duration:  maximum time where the second break must be taken. Enter the maximum number of hours needed to work to receive the second break.
5) First Reminder After Duration: time after shift start when the worker will be reminded to take the first meal break.
6) Second Reminder After Duration: time after shift start when the worker will be reminded to take the second meal break.
7) Reminder Frequency:  how often the system will remind an employee to take a break if it hasn't been done after the specified time.
8) Duration of the Meal Break: how much time the employee is expected to take as a meal break.  
The above example shows 30 minutes.  Employees will be entitled to take a first break if they work at least 4 hours and a second break if they work 8 hours.  A meal break is require if they work 5 or more hours.  If the staff hasn't taken the break once the maximum worked time is reached, a notification will be shown every 15 minutes.

The following example shows a worker who is approaching the 4th hour worked and not taken a break.
Once the employee has passed the 4-hour mark, they will receive the following reminder:
If the meal was taken after the first or second period (according to the order the breaks are setup) the user will be prompted to confirm that it was either at their election or due to work requirements.  Completing this step will require a signature.
If the Meal was finished before the duration set (in this example 30 minutes) the field worker will be prompted to confirm it was at their own election or if it was because of work requirements.  A signature is also needed to proceed.  This step will be the same for both the first and second meal breaks.
At the end of the day when the employee clocks out, a series of questions will be shown as follows:
Please keep in mind that the questions will be shown depending on the answers the employee provide.  The above images with Yes/No buttons illustrate all the possible questions your staff will see.
The Premium Pay will only be recorded once in  one of the following scenarios, which will be the first one that happens.  This is using the same examples of a first period of 4 hours and second period of 8 hours setup with a meal time of 30 minutes.  Feel free to substitute these values with what your organization uses.
1)  If the first meal was taken after the 4-hour period due to work requirements. 2) If the second meal was taken after the 8-hour period due to work requirements.  3) If the meal had to be finished in less than 30 minutes also due to work requirements.
If you wished to review the information generated with this functionality such as the answers to the questions and the signatures, you can use the "Premium Pay Raw Data Report," found in the Reports section.

Changing the Job History Settings

Changing the Job History Settings
The amount of time that "Job History" (Icon#4) and attachments can be stored is determined by the settings created by the user.  To enable, make sure to open the Menu and select "Settings." Once inside the "Settings, open the menu again and choose "Extras."
Choose to "Edit" 1) Period after which attachments will be deleted. 2) How long the history will be preserved.  
These are the selections that will be available for both options. 
Make sure you select the ones that apply and "SAVE."  When Happy "SAVE" 

Setting Up User Types

 Setting Up User Types
User types are set up from 2 locations. One is from the "Field Workers" tab and the other is from the "Administration" tab. Each location sets different types of users. This post tells how to set users from the "Manage Users" section of the "Administration" tab.

"Field Workers" and "Web-Device Users" are formed in the "Field Workers Tab." The Field Worker has his own device in the field and the Web-Device User clocks in from a device along with many others. Those are done from the "Field Workers Tab" To create all other user types:

Sign in to Admin and click on "Manage Users" then "Add New" Use the drop-down menu to choose the "User Type" - NOTE: Do not use "Field Worker" from this drop-down they will not be properly entered.
*) Administrator: People in charge of managing account setup and all other users in the system. The Administrator has access to all tabs these include: Home Lists, Field Workers, Web Devices, Administration, and Reports. Their typical screen is shown below:
*) Web Manager: People in charge of monitoring or aiding with punches specifically for office-based staff. This focuses solely on Web Device Users who clock in through the Web-Based TimeCard. The Web Manager will only have access to the Web-Device TimeCard as shown below:
*) Web User: This is different from a "Web Device User" A "Web User" is a day to day user of the system for monitoring mobile staff and generating reports but restricted access to the account settings. The Web User has a more limited access than the Administrators and can only see the following limited sections: *) Home Lists *) Field Workers *) Reports. They can review team members details but can not make updates or manage settings in the account, but they can do some basic edit punches.
*) Web Team Leader: Managers that need "Administrator" level access but only focusing on specific teams or users. The "Web Team Leader can have the same tabs as the Admin but limited access to the information that is on each tab. Again those tabs are: *) Home Lists *) Field Workers *) Administration *) Reports
*) Operations Manager: Managers to approve employee time sheets assigned to them after the employee has signed off through the application. Op's Managers can see the same as Web Team Leaders with two differences: 1) They can view the entire organization. 2) Instead of being able to upload field workers on the Administration tab, they can use a feature called "Approve Timesheets:
Even though Op's Managers can view the whole company they can only view the tasks that are assigned to them, this is done through the "Maintain Task/Customer List Screen (Administrator View)
Go to existing job and click on its ID, Click on the "Task Owner/Manager" option from the drop-down menu:
This will link the job to the Operations Manager allowing them to review and approve any timesheets that an employee has signed from a device:

Custom Forms

Custom Forms
Custom forms, as the name implies, are used to create and capture form information.  These will be created with the existing functionality of "Custom Fields." The fields can be created and organized exactly as needed to insure employees will be able to access the forms and enter necessary data.
To set this up, go to the Administration tab and click on "Manage Custom Fields/Forms"
Once inside, click the "Add New" button at the top:
The "Details" menu will open as shown below:
Enter the "Name" or Title of the custom form.
The Triggers section is used to determine at what point the form will be displayed or accessed. "Manual" is used to access the custom form at any moment the employee is clocked-in.  CLOCK IN will prompt the when employee at the time they clock in to fill out the form before he/she clocks in.  CLOCK OUT prompts the employee to fill out the form the moment he/she clocks out.  "Clock Out" is used in this example:
Once the "Name" has been entered, Highlight "Clock Out" and click "add" this will move it to the side as shown above.  Click "Save"  Next, go back to the "Manage Custom Fields/Forms" section under "Administration" and our newly added form will be there at the bottom of the list. Click "Edit"
Notice there are some new options in the "Details Screen":
Use of the "Filter" section enables the form to be accessed only for a specific "Task."  This makes most sense to use when creating a "Manual" form that can be accessed at any time during the workday, but keep in mind that filters are a very powerful tool in case there are forms that are exclusive to a specific type of activity.
NEXT: click on the "Edit Form Fields."  (These fields will be covered in full in another blog) Add the fields that are relevant to your company and this form:
When accessing the mobile application the "Menu" section will show the option called "Forms."  All "Manual" forms created can be viewed there.

Timesheet Signoff

Timesheet Signoff
The "Timesheet Sign-off" allows team members to sign-off their own timesheets directly from their supervisor's device.  Timesheets can be set up to be signed off on a Daily, Weekly or Monthly basis.  The Administrator will enable this feature from the web-portal.

To enable the Sign-Off.  Go to the "Administration" tab, select "Preferences."  Look for the following option and make sure to click the checkbox.
Tap the "Save" button - The mobile applications are now ready to go.
The Supervisor/Team Leader in charge of clocking in/out team members will be able to access the "Multi User Mode".  Typically, the timesheet sign-off is done either Daily, Weekly, or Monthly.  Weekly is the most common.  The sign-off should be done after the completion of the week or before payroll is submitted.
Team members will be able to enter his/her login credentials from the drop-down menu.  Then enter their password and tap Log-In.  The app will attempt to connect with the server
 Next, the employee will see a summary of the work hours corresponding to the previous day / week / month.  If everything is correct, the employee can place their signature in the signature box.  If they need to correct an item, just tap on "Clear", if they are good to go, just select "Save."
A confirmation will appear asking if you wish to send the signature.  Select "YES" and then the app will summit your timesheet with signature.


 Last - open the Menu and select "Log-Out" to finish the session so the next team member can sign in and repeat the procedure.  A confirmation screen will appear, if you are ready to exit select "YES."

Sending Messages and Attachments

Sending Messages and Attachments
Sending messages and attachments right from the web portal to Pacific Timecard is quick and easy!

Log in to the web-portal and click on "Field Workers" tab.  On the right side is the "Send Message" button.  Click on the button for the employee you wish to send a message too.
To send a message to multiple users, click on the corresponding check boxes on the left and use the icon located on the top right as shown below:
Click "Send Message" and the message screen will appear, type your message as demonstrated:
Once done, Click on "Send Message".  To attach a file to the message, click the "Choose File" button below the "Send Message" button. 
Locate and Open the file needed for upload:
Click "Send File" button, located below the "Choose File" Button.
The message or file will be sent to the device and a notification will show on the device as shown below:

For the mobile device employee to view the message, simply open the menu on the main Timecard screen and select "Messages."
A list of messages will appear with the new message at the top, the file sent will also be there.  The attachment may be downloaded to the device or delete as needed.


New Enhancement: Bi-weekly Timesheet Signoff

We have a quick announcement to make on this post, we have just implemented a new much requested frequency for the  timesheet signoff :  B...