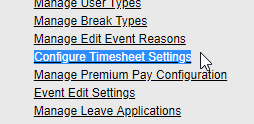
Click on "Add New Customer Service".
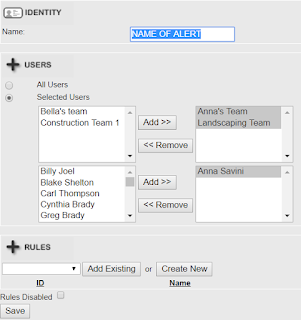
Follow the next steps from this image:
Name: Enter the name of the alert
· Users: Here you can either apply the alert for All Users or pick the specific teams or users that it should apply to.
· Rules: The next step after this is clicking on “Create New”. Don’t save it because the alert is not ready yet!
On the next step, you will create the alert, make sure to name it the same as in the previous step for consistency and easier management, for that, use the Name field.
Trigger: Select the appropriate trigger from the Trigger drop down menu. For the purpose of these alerts, use either "Worker Clocked In Outside Allocated Time Window" or "Worker Clocked Out Outside Allocated Time Window".
After selecting the trigger, set the time frame for which the alerts will apply, as shown on the next image. Make sure to select the appropriate time and dates, since these will be the ones used to monitor if the employee has clocked in or out between these times.
The "Trigger Immediately" option will enable the system to alert you if the time frame has started and the user has not clocked in or out (according to your rules). If this is left unchecked, then you will be notify until the user clocks in or out, and not right when the time frame starts.
When you are ready, click on “Create New Action”.
These next steps will show you how to setup an alert so you can get an automated email whenever an employee triggers one of the events we setup on the previous steps. This is what you should see:
Action Name: Enter the name of the alert.
Send Email Alert: You can setup an Email Alert to be sent to any person that you need, just make
sure to enter the email address on the Email To field. If you are using multiple addresses, separate them with commas. Enter the Email Subject and Body.
When you are ready, click on "Save".
You will be taken to the previous step, now the ACTIONS dropdown menu will be pre-populated with the Action (Email alert) you just created.
Click on “Save” to continue.
Next, you will be back at the initial screen where you originally named the alert and specified the teams/employees it applies to. The drop down menu will also be pre-populated. If for any reason the drop down menu is blank on this or the previous step, do not worry, if you had created the rule or action, you can just open it and you will find it there.
Click on “Add Existing” to add the rule.
This step is very important because it ties the rule and the alert together,
If you omit this and Save it, then the trigger won’t work properly.
Finally, after clicking on “Add Existing”, your newly created alert will be showing just like in the example. Now you are ready to click on “Save”!